

LOCATION POSTER
1
Define each code.
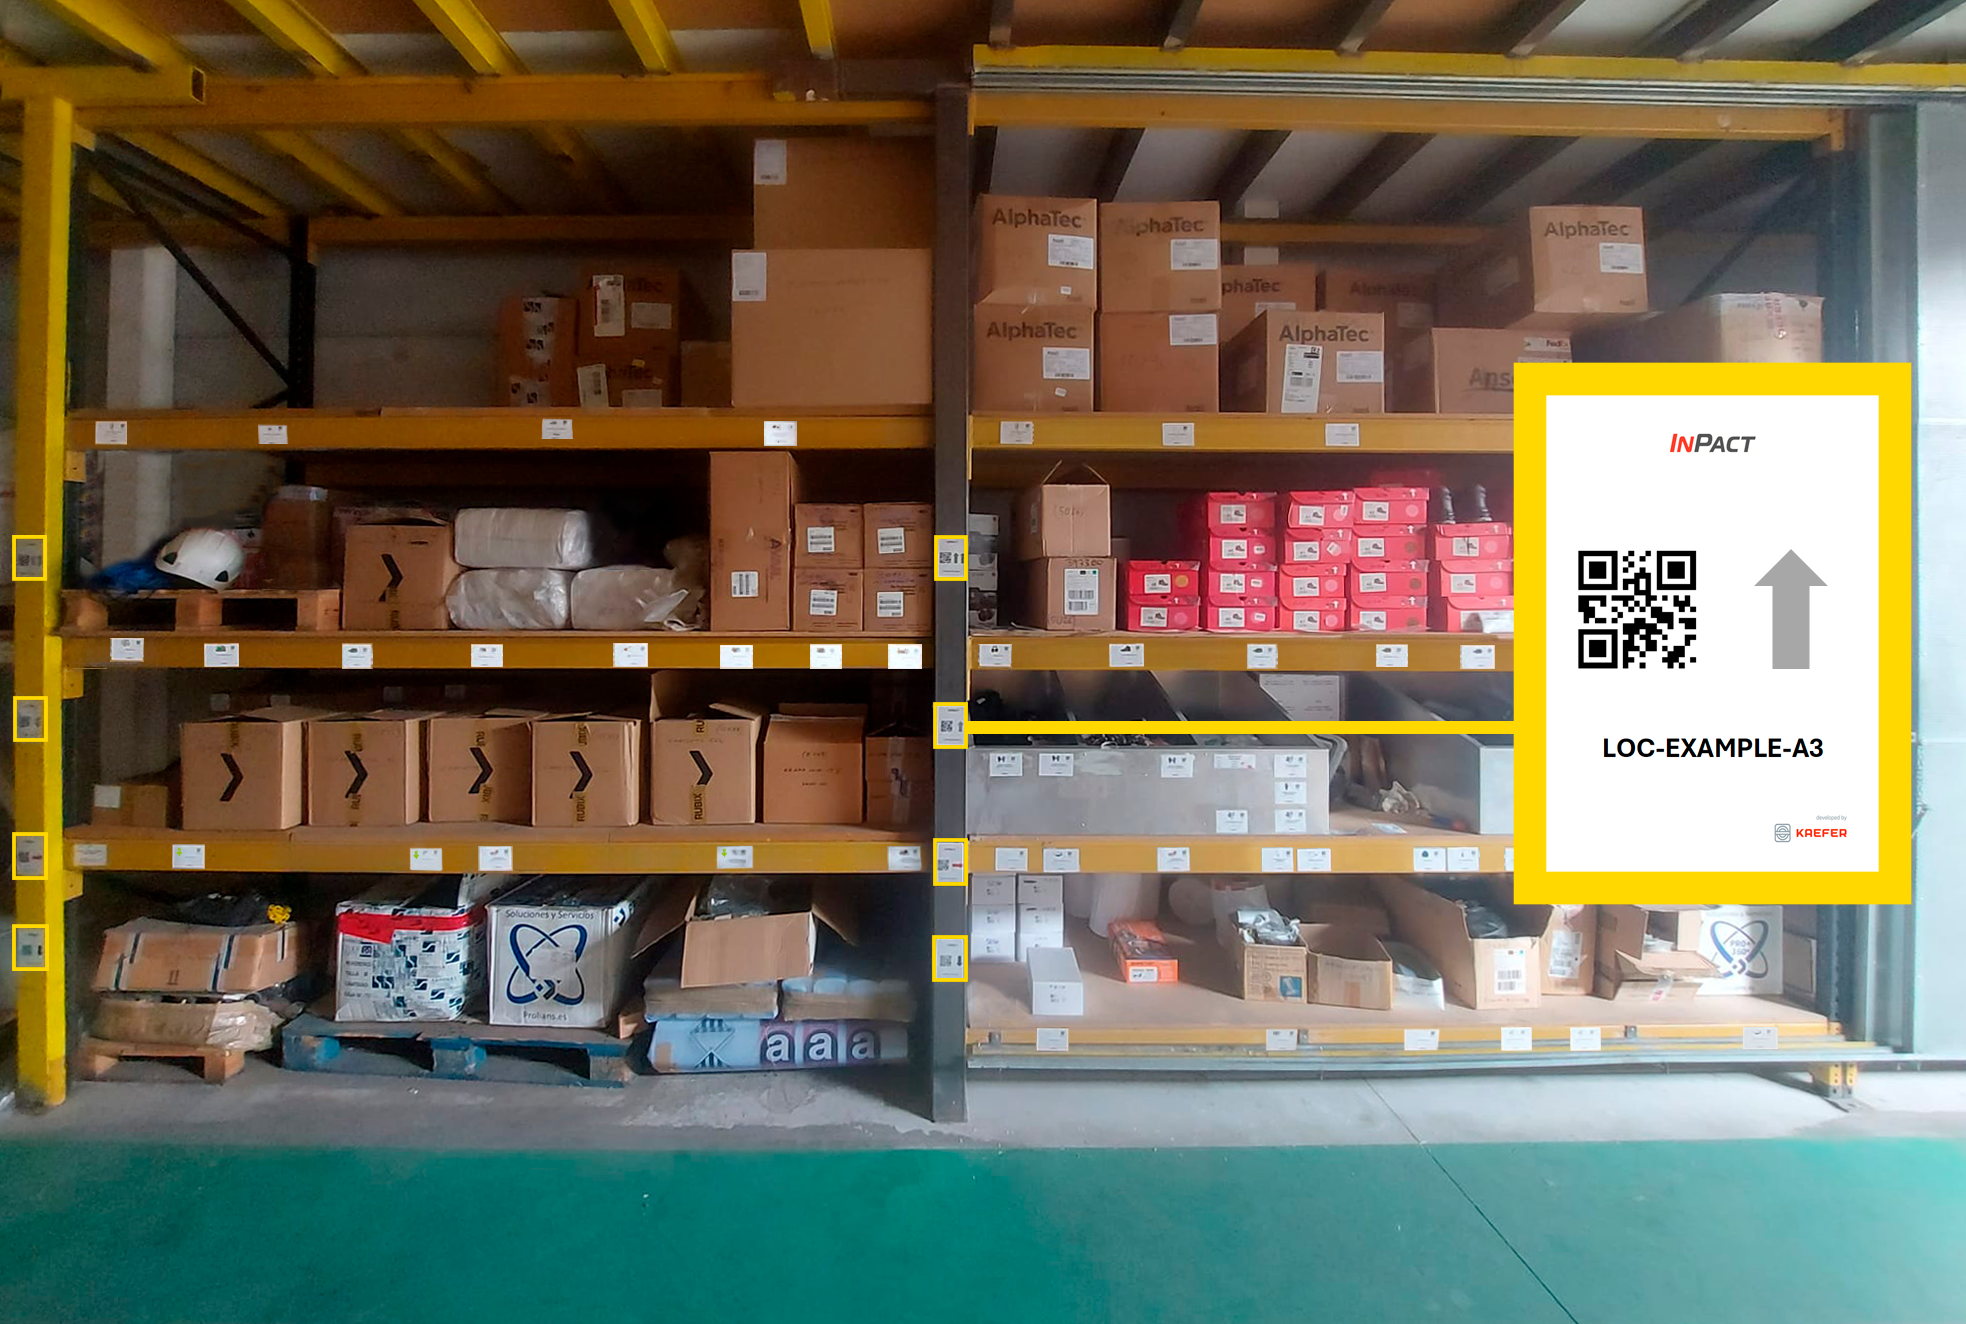
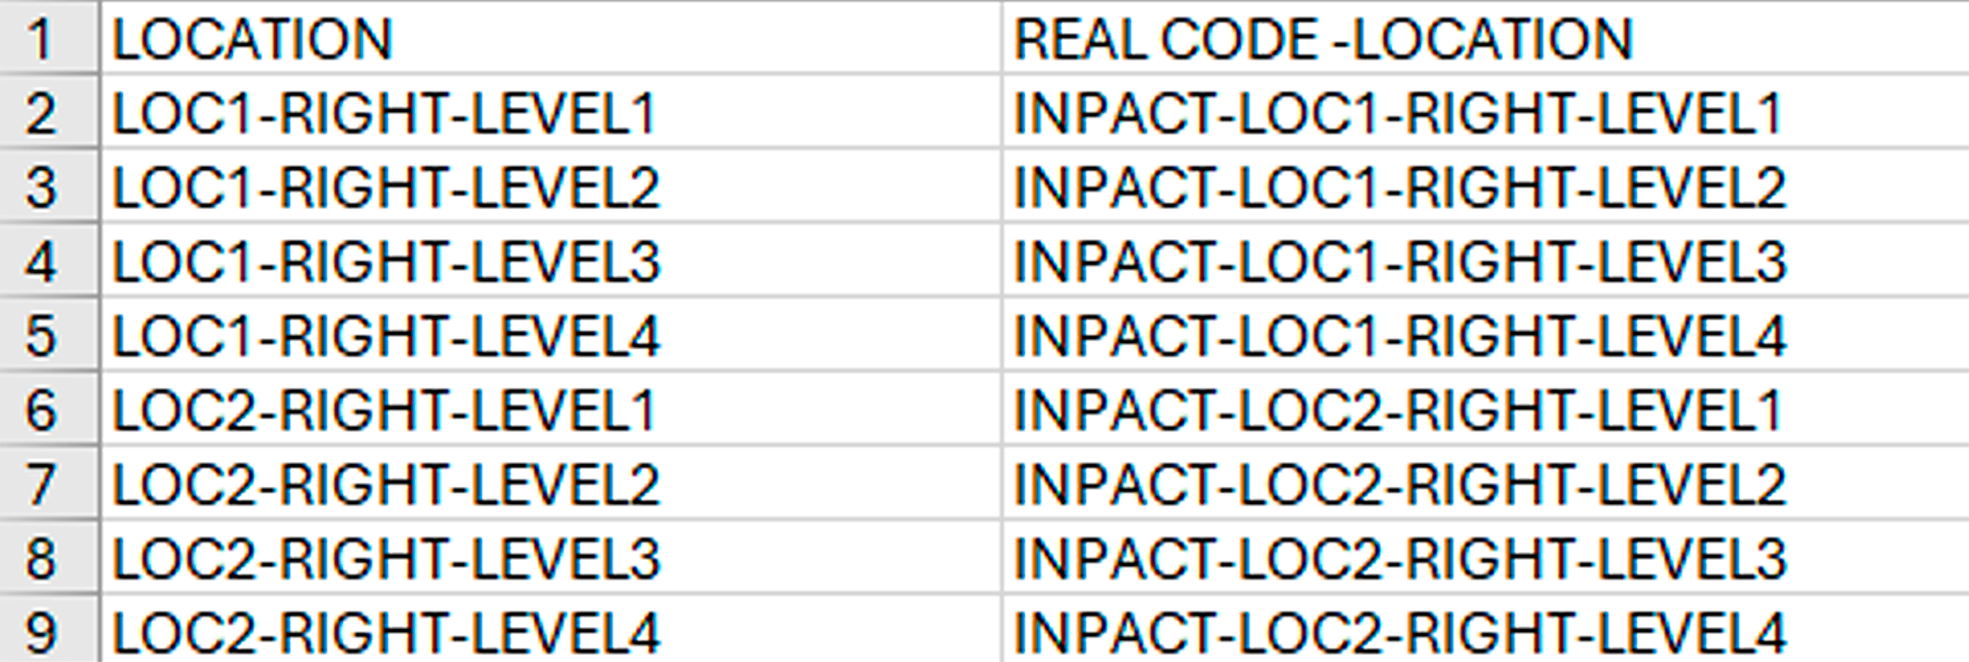
Based on the defined strategy, codes are generated for the locations. Depending on the case, the full code may not be displayed on the sign.
Below are the recommendations:
IMPORTANT
Adjust and define according to the desired level of precision.
Consider whether the same person will always use it, if including multiple locations per shelf level adds value, or if it can be simplified by using a single level among other aspects.
For this point, there is no right or wrong answer; the approach should simply align with your specific needs and workflow.
hover over the NEXT imageS to discover more information
LOW PRECISION
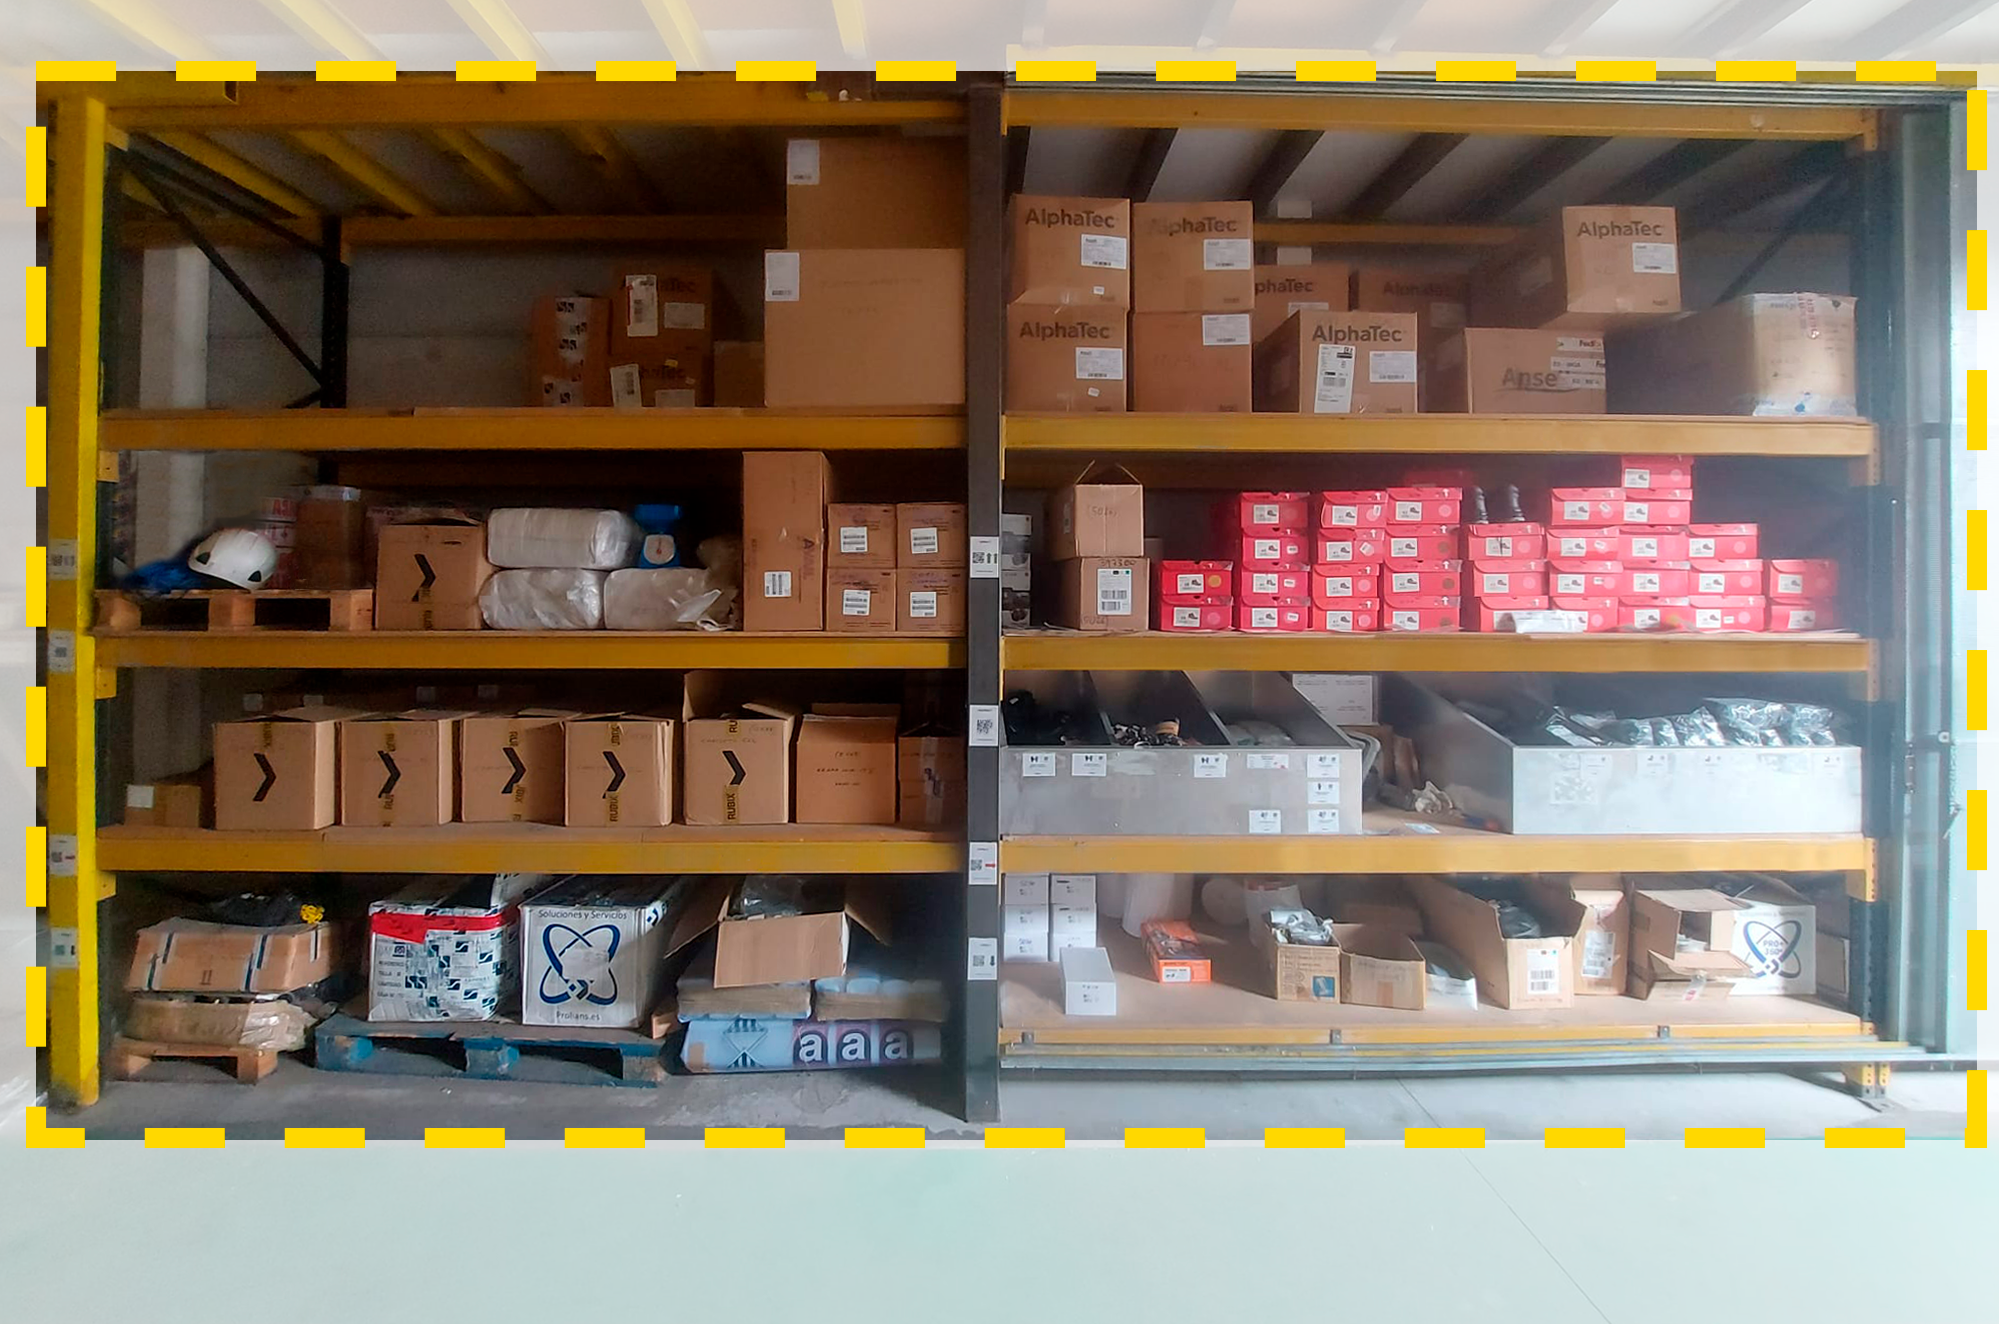
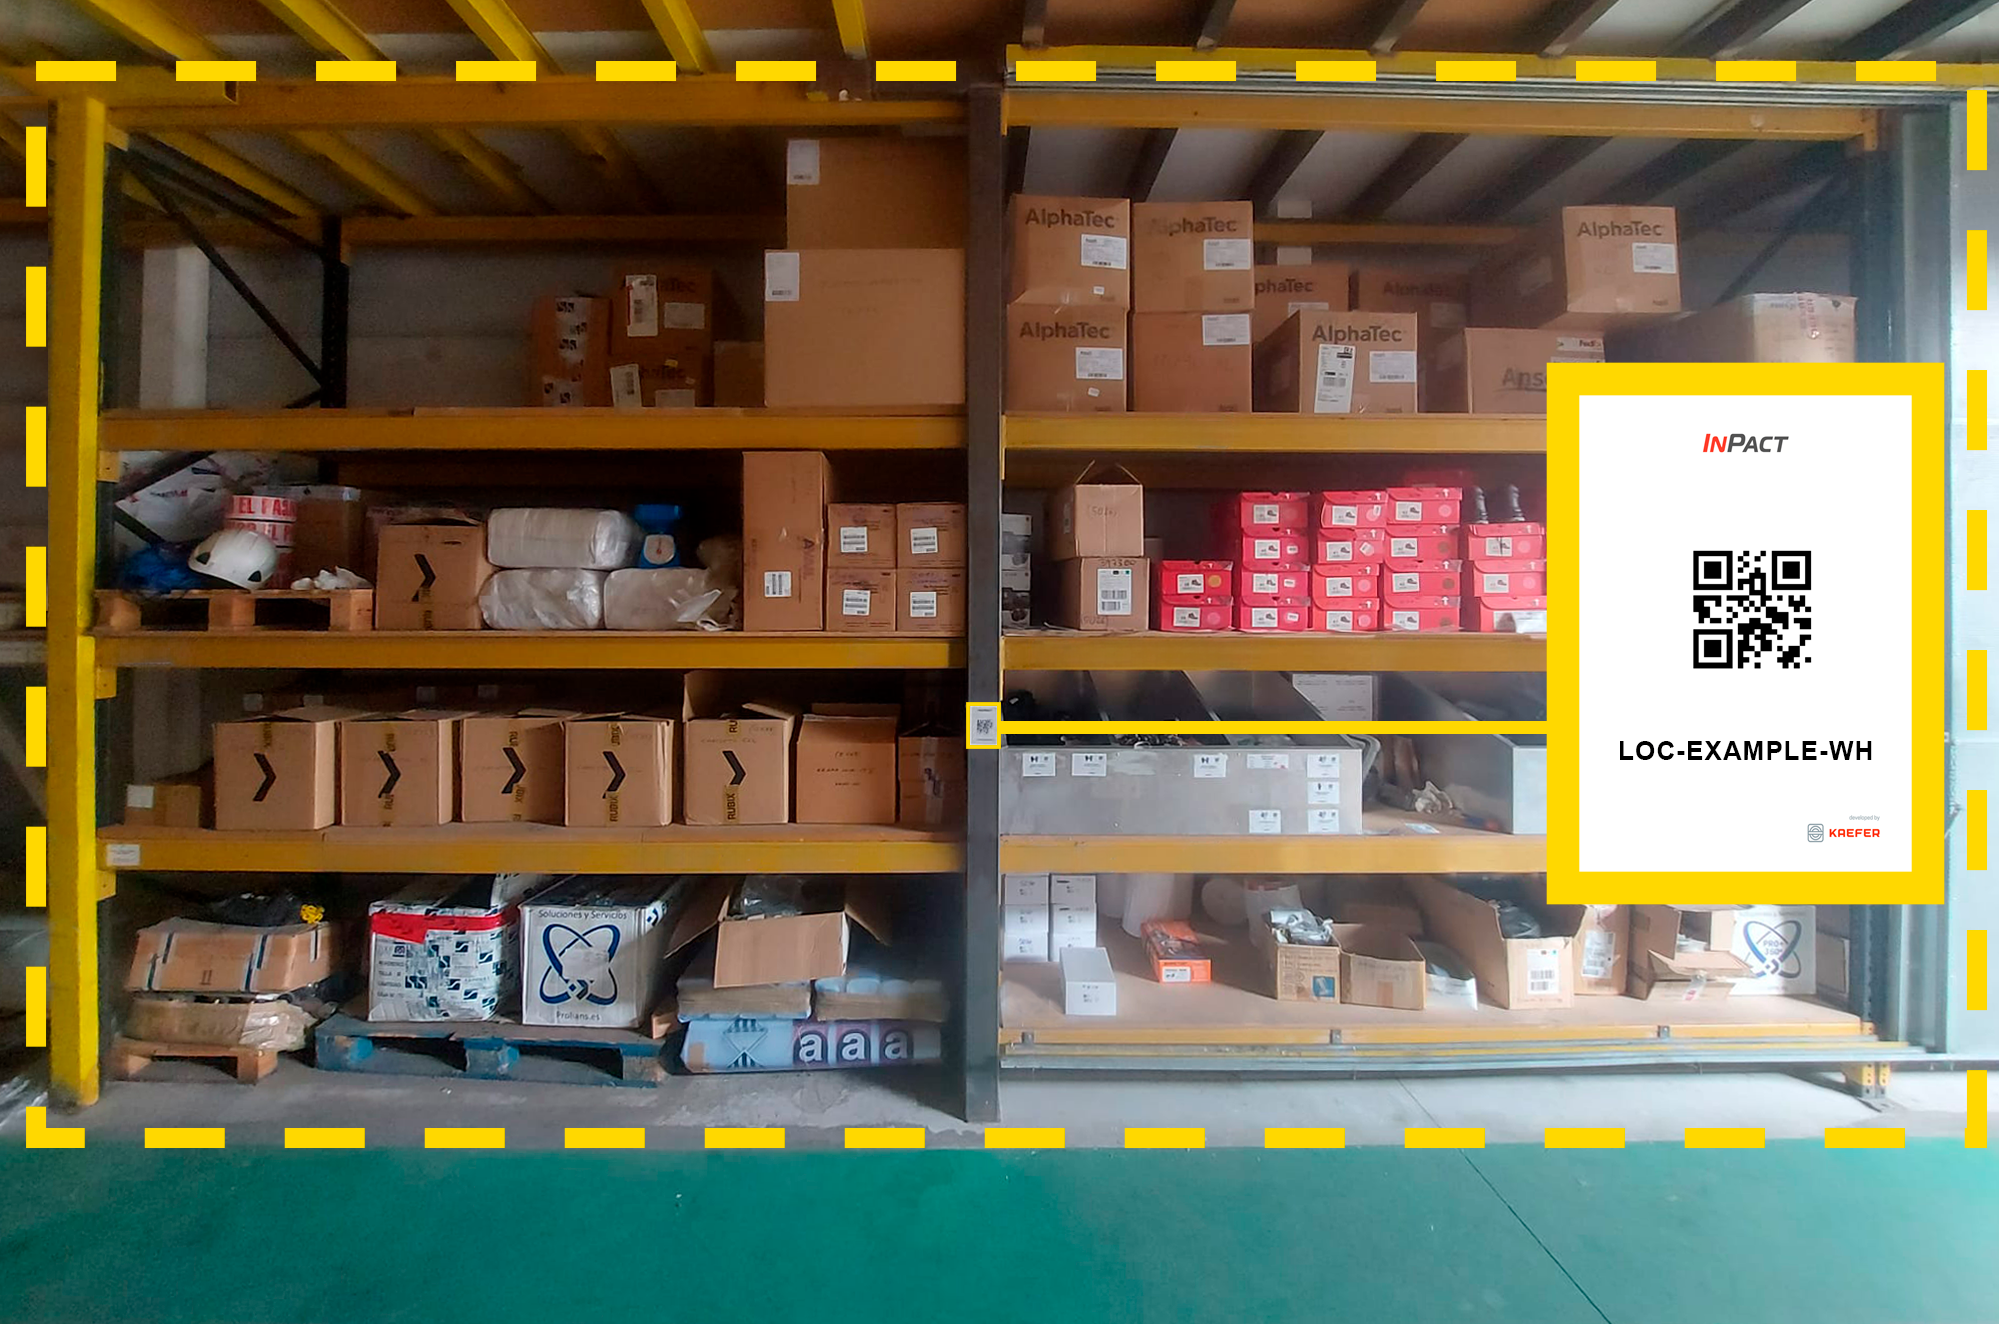
This approach involves using a limited number of locations, resulting in less complex organization. While it significantly reduces the risk of errors by simplifying processes, it also sacrifices precision in inventory control and item localization.
It is an optimal solution for generic containers where stored products do not require exact identification or for warehouse areas where precision is not a priority.
For instance, it could be applied in zones with homogeneous, low-turnover materials.
MEDIUM PRECISION
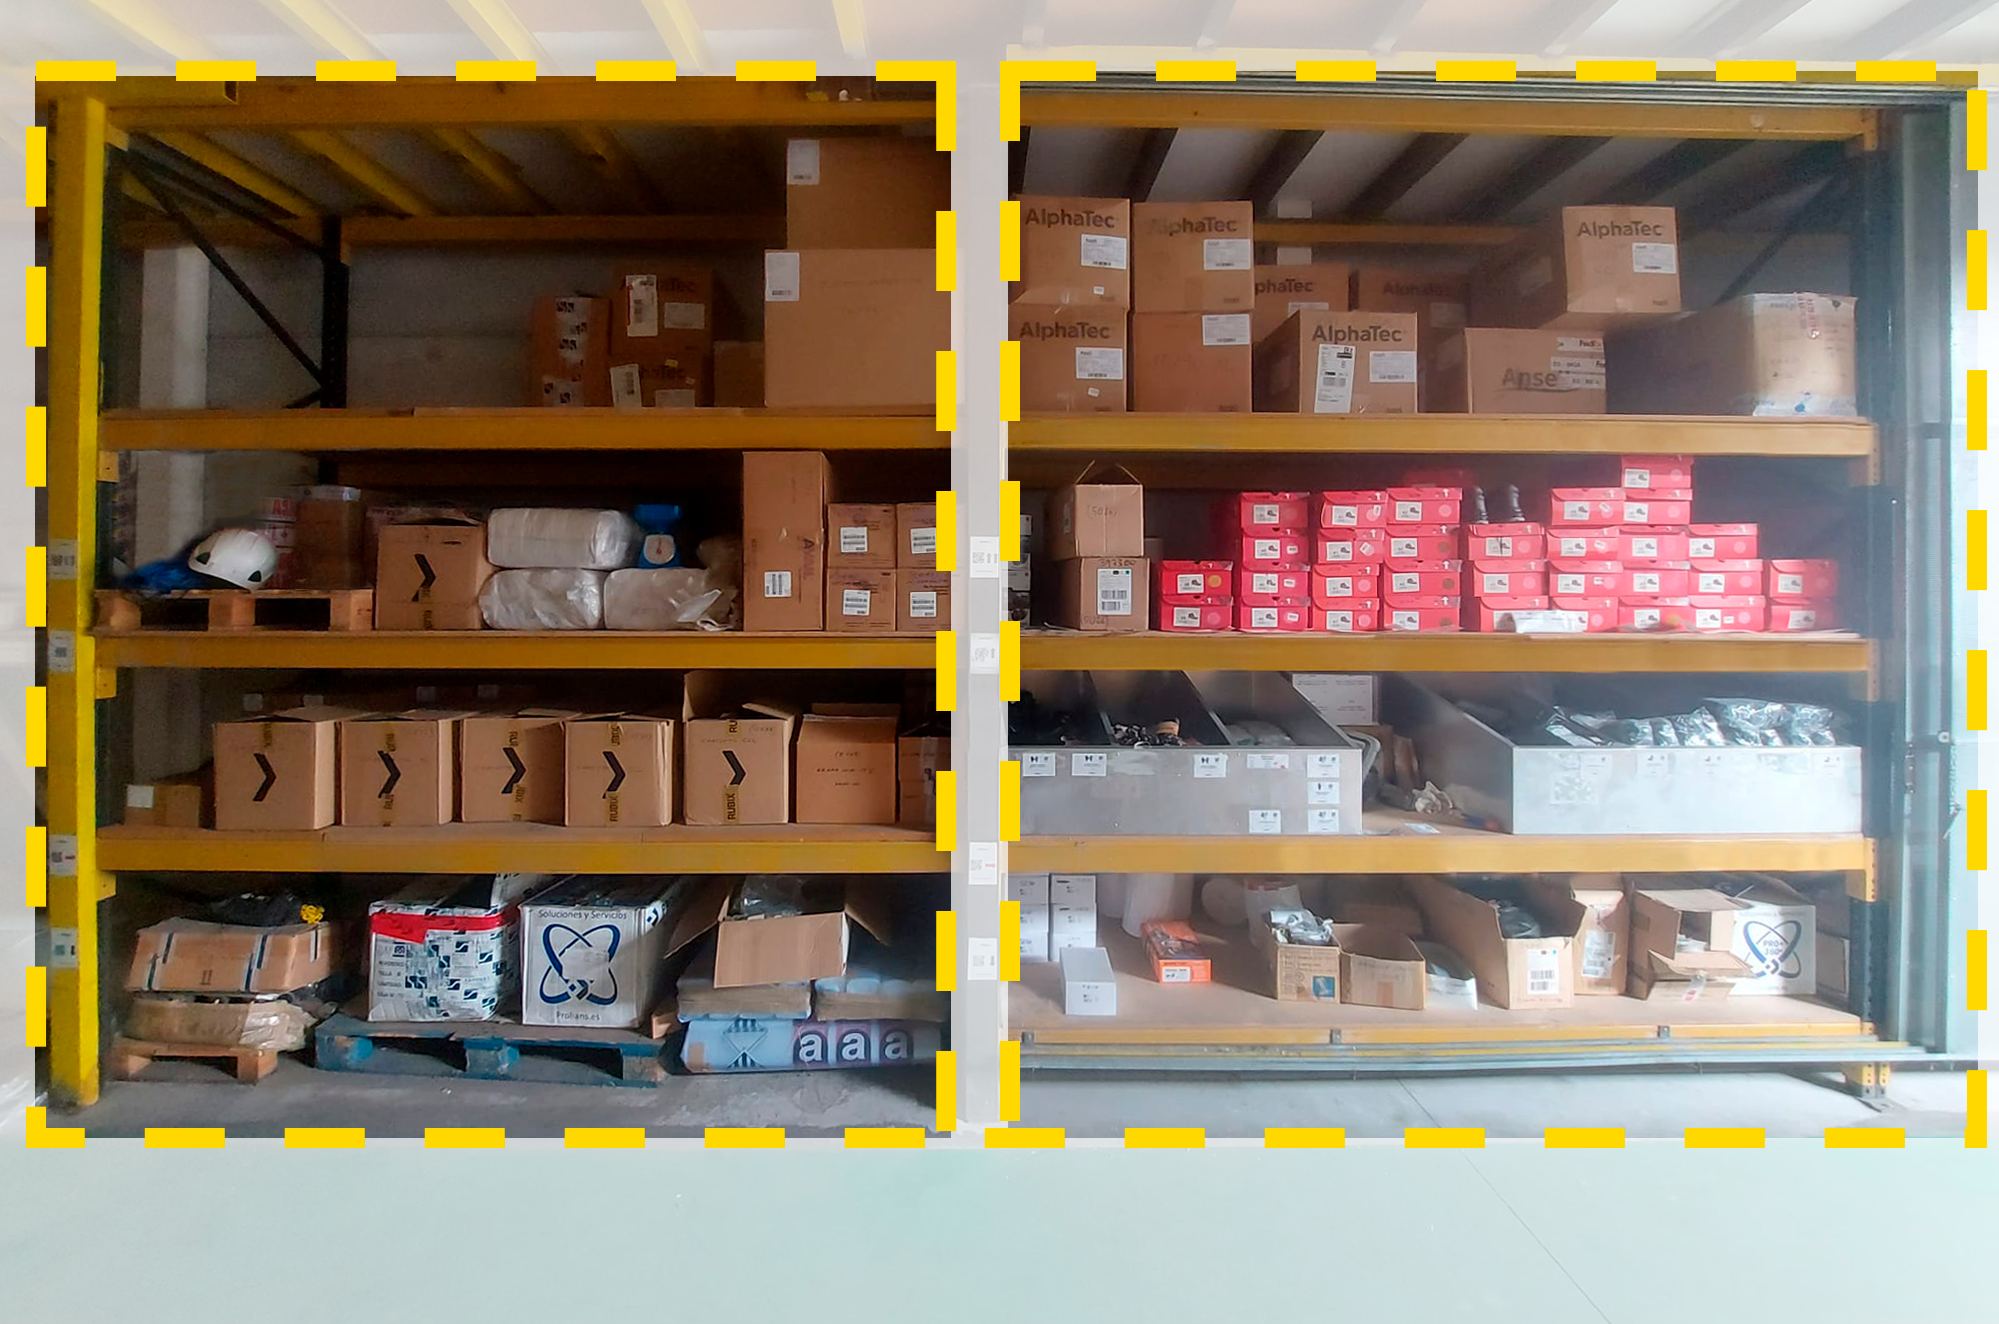
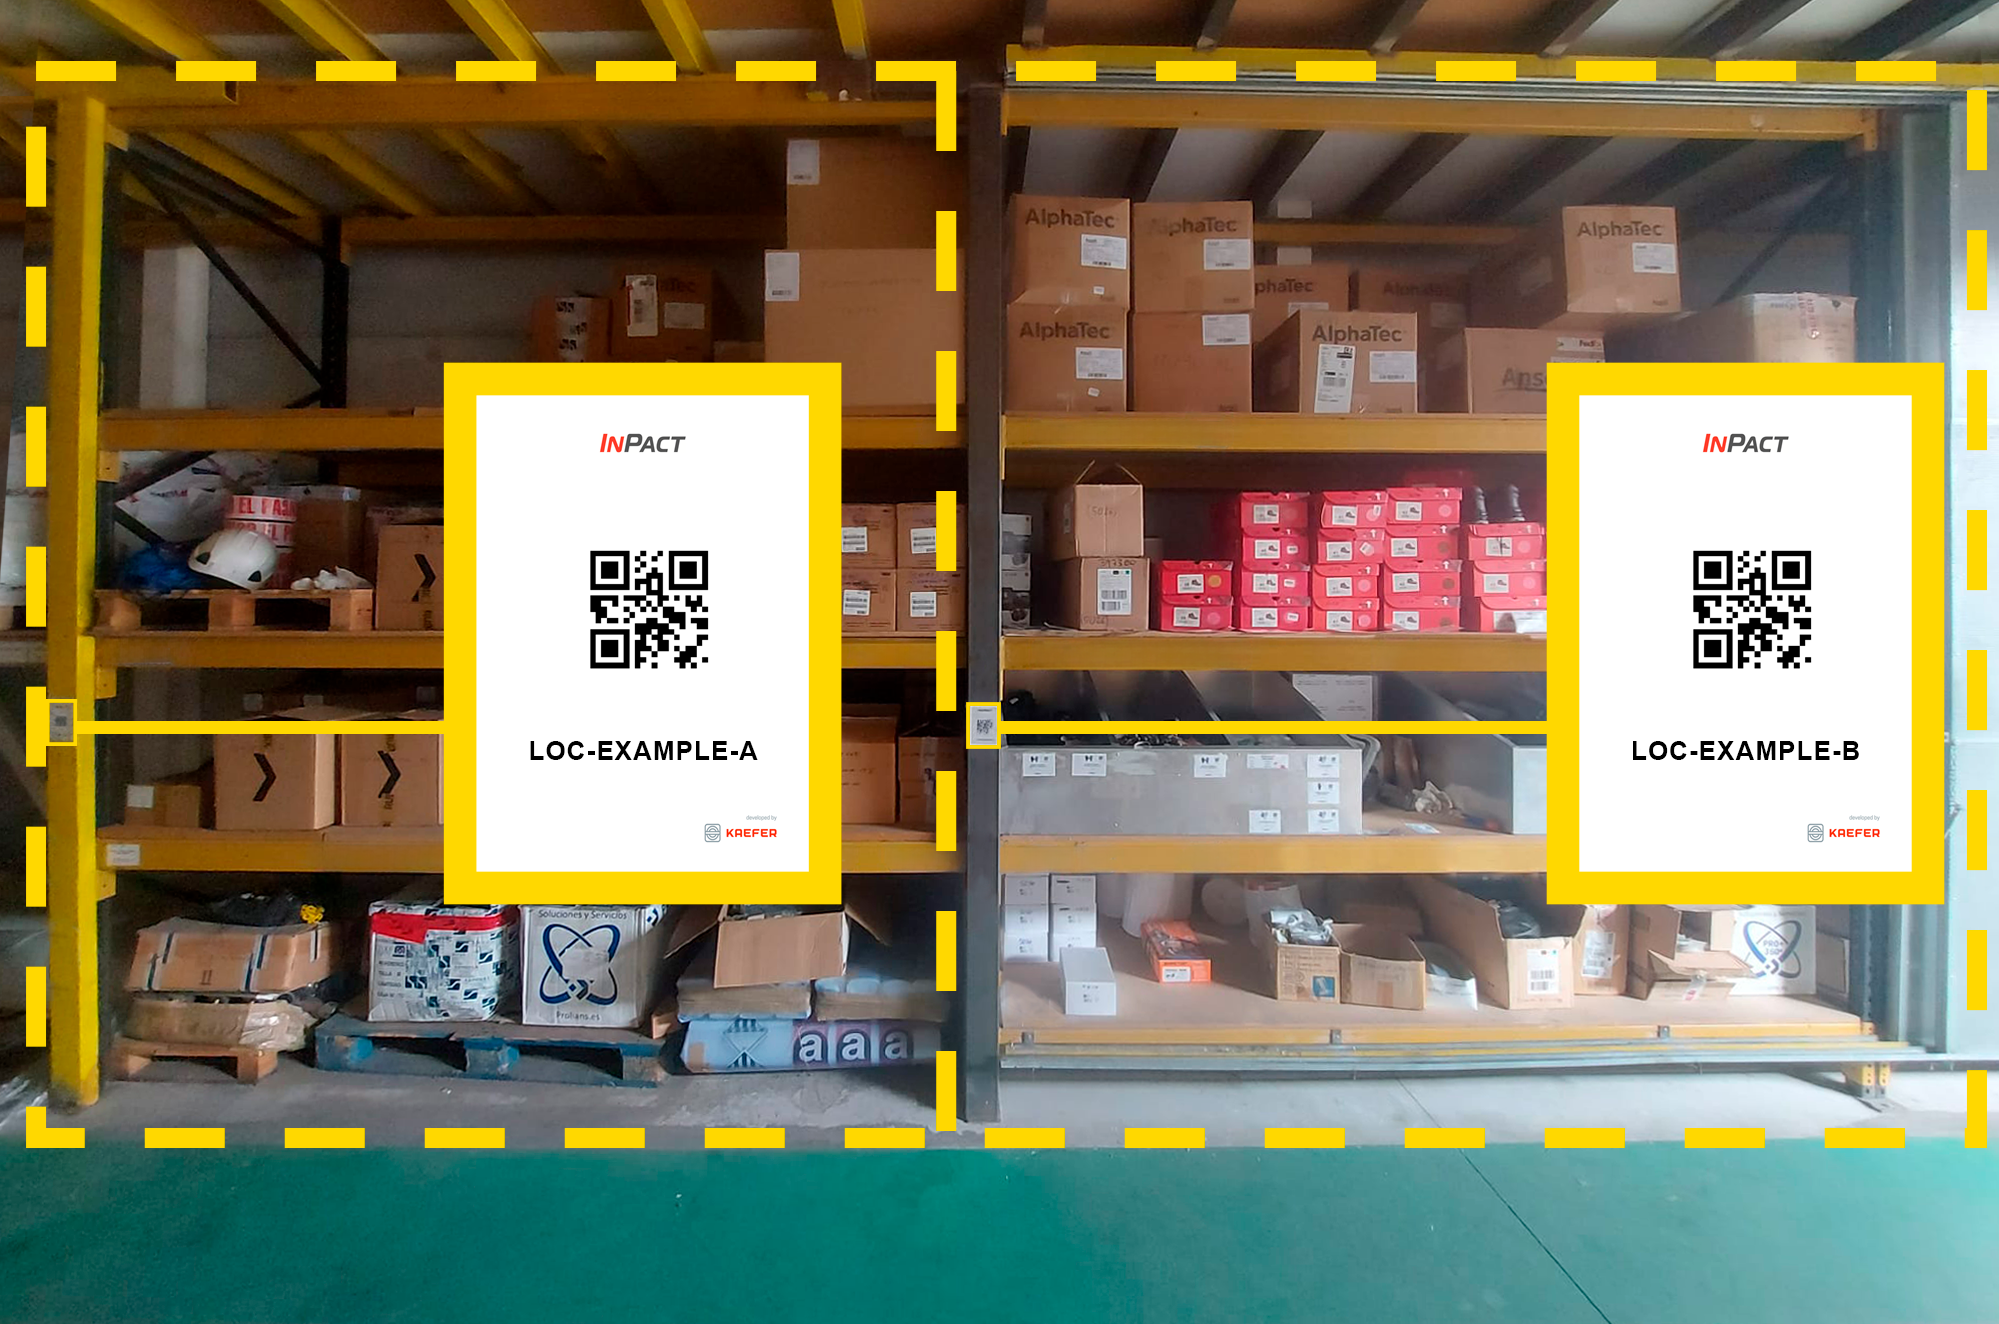
This level strikes a balance between accuracy and simplicity. The space is organized into locations that provide more detail than low-precision level.
Although there is a slight increase in the risk of errors due to the number of locations to manage, this system offers a moderate level of accuracy that is sufficient for many daily operations.
It is particularly suitable for shelves or warehouses managed by a single person, where familiarity with the storage system allows for reasonable control without increasing complexity
HIGH PRECISION
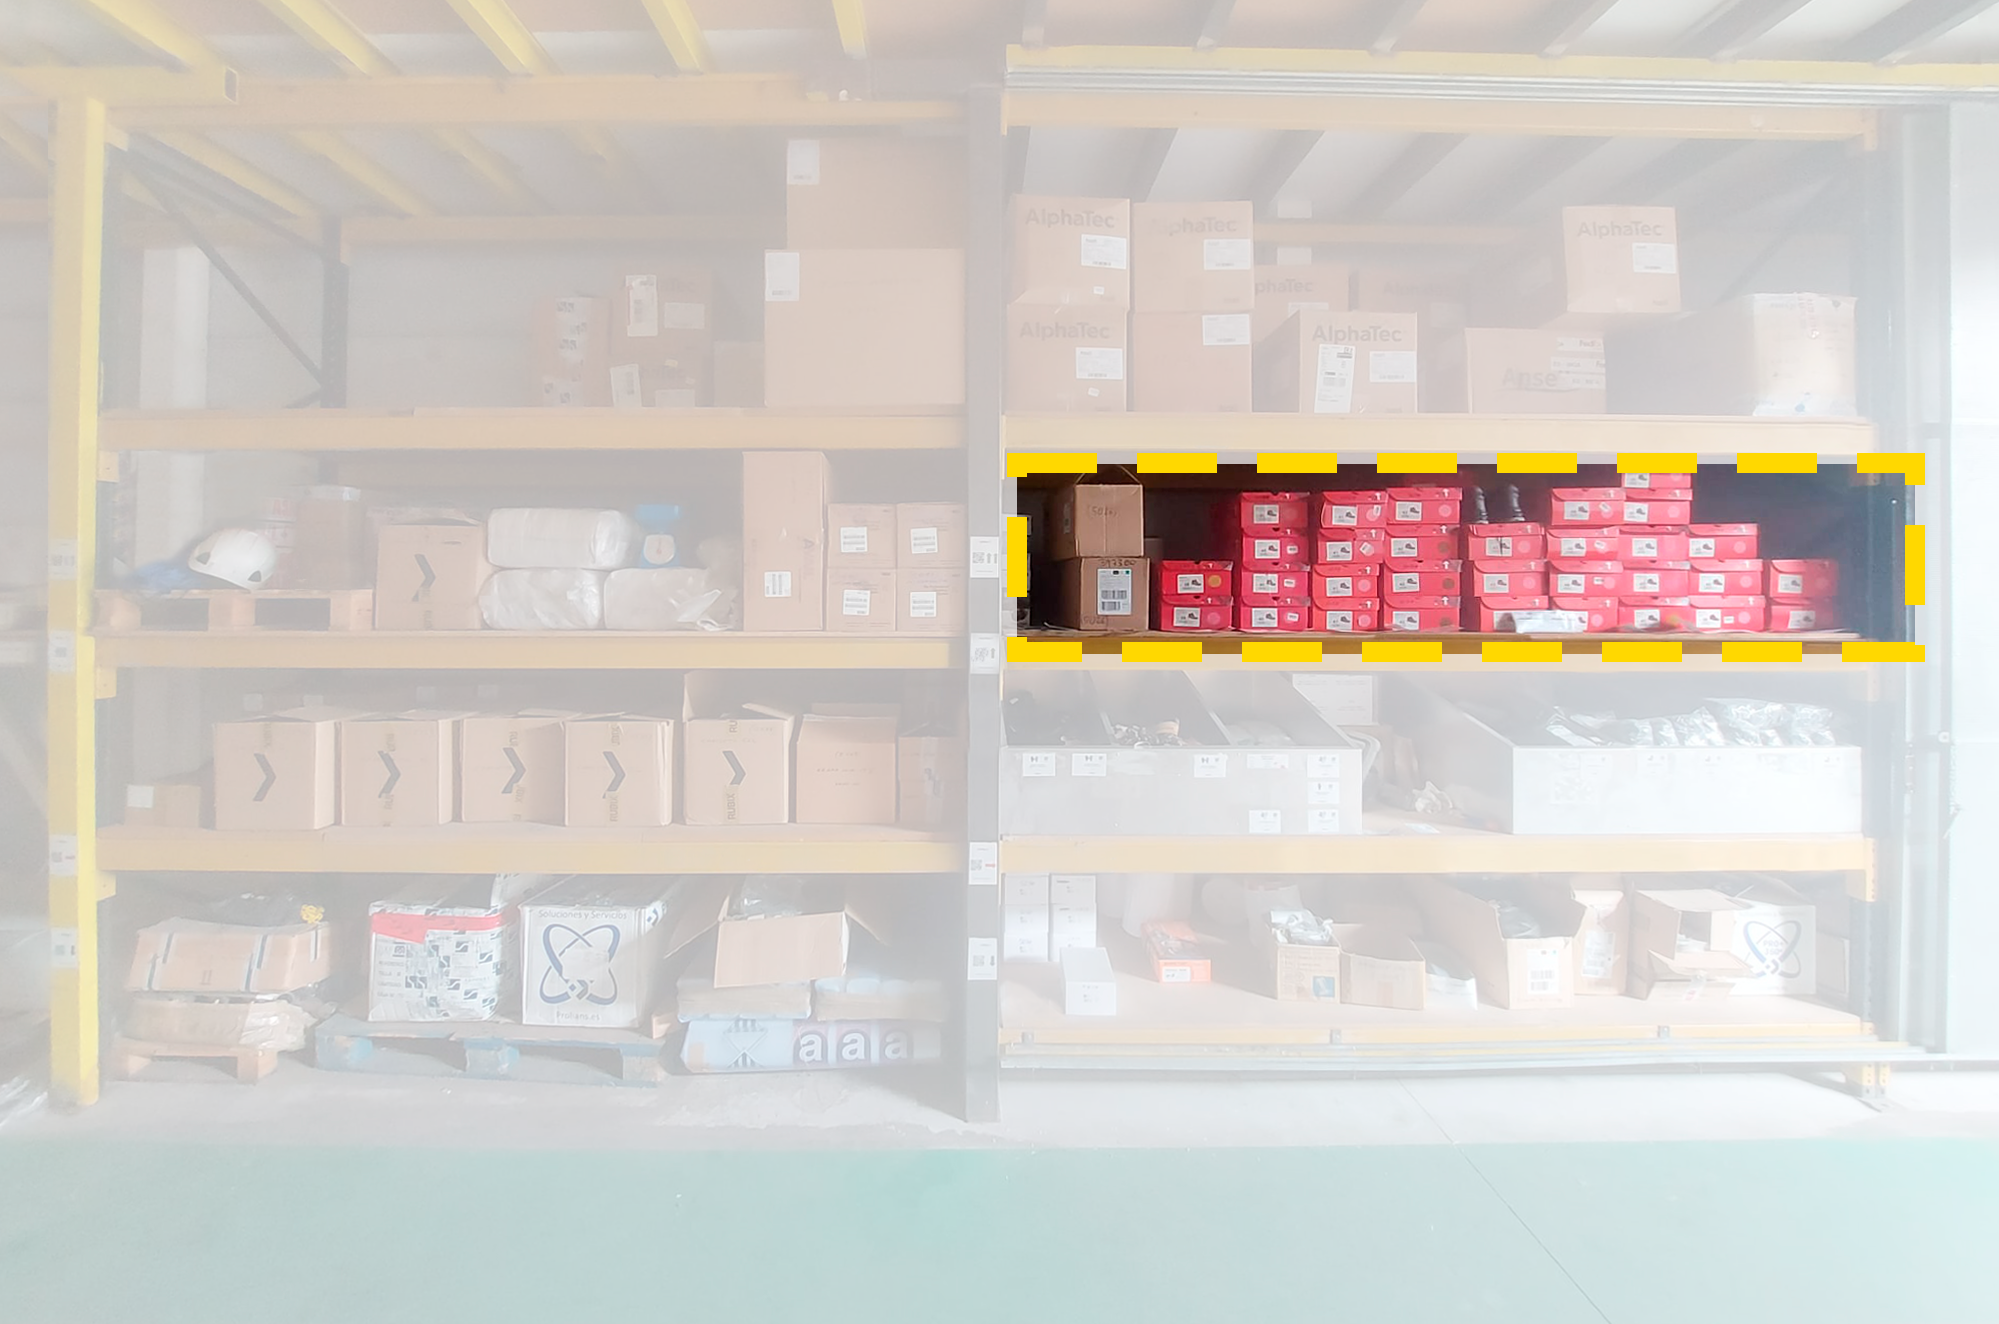
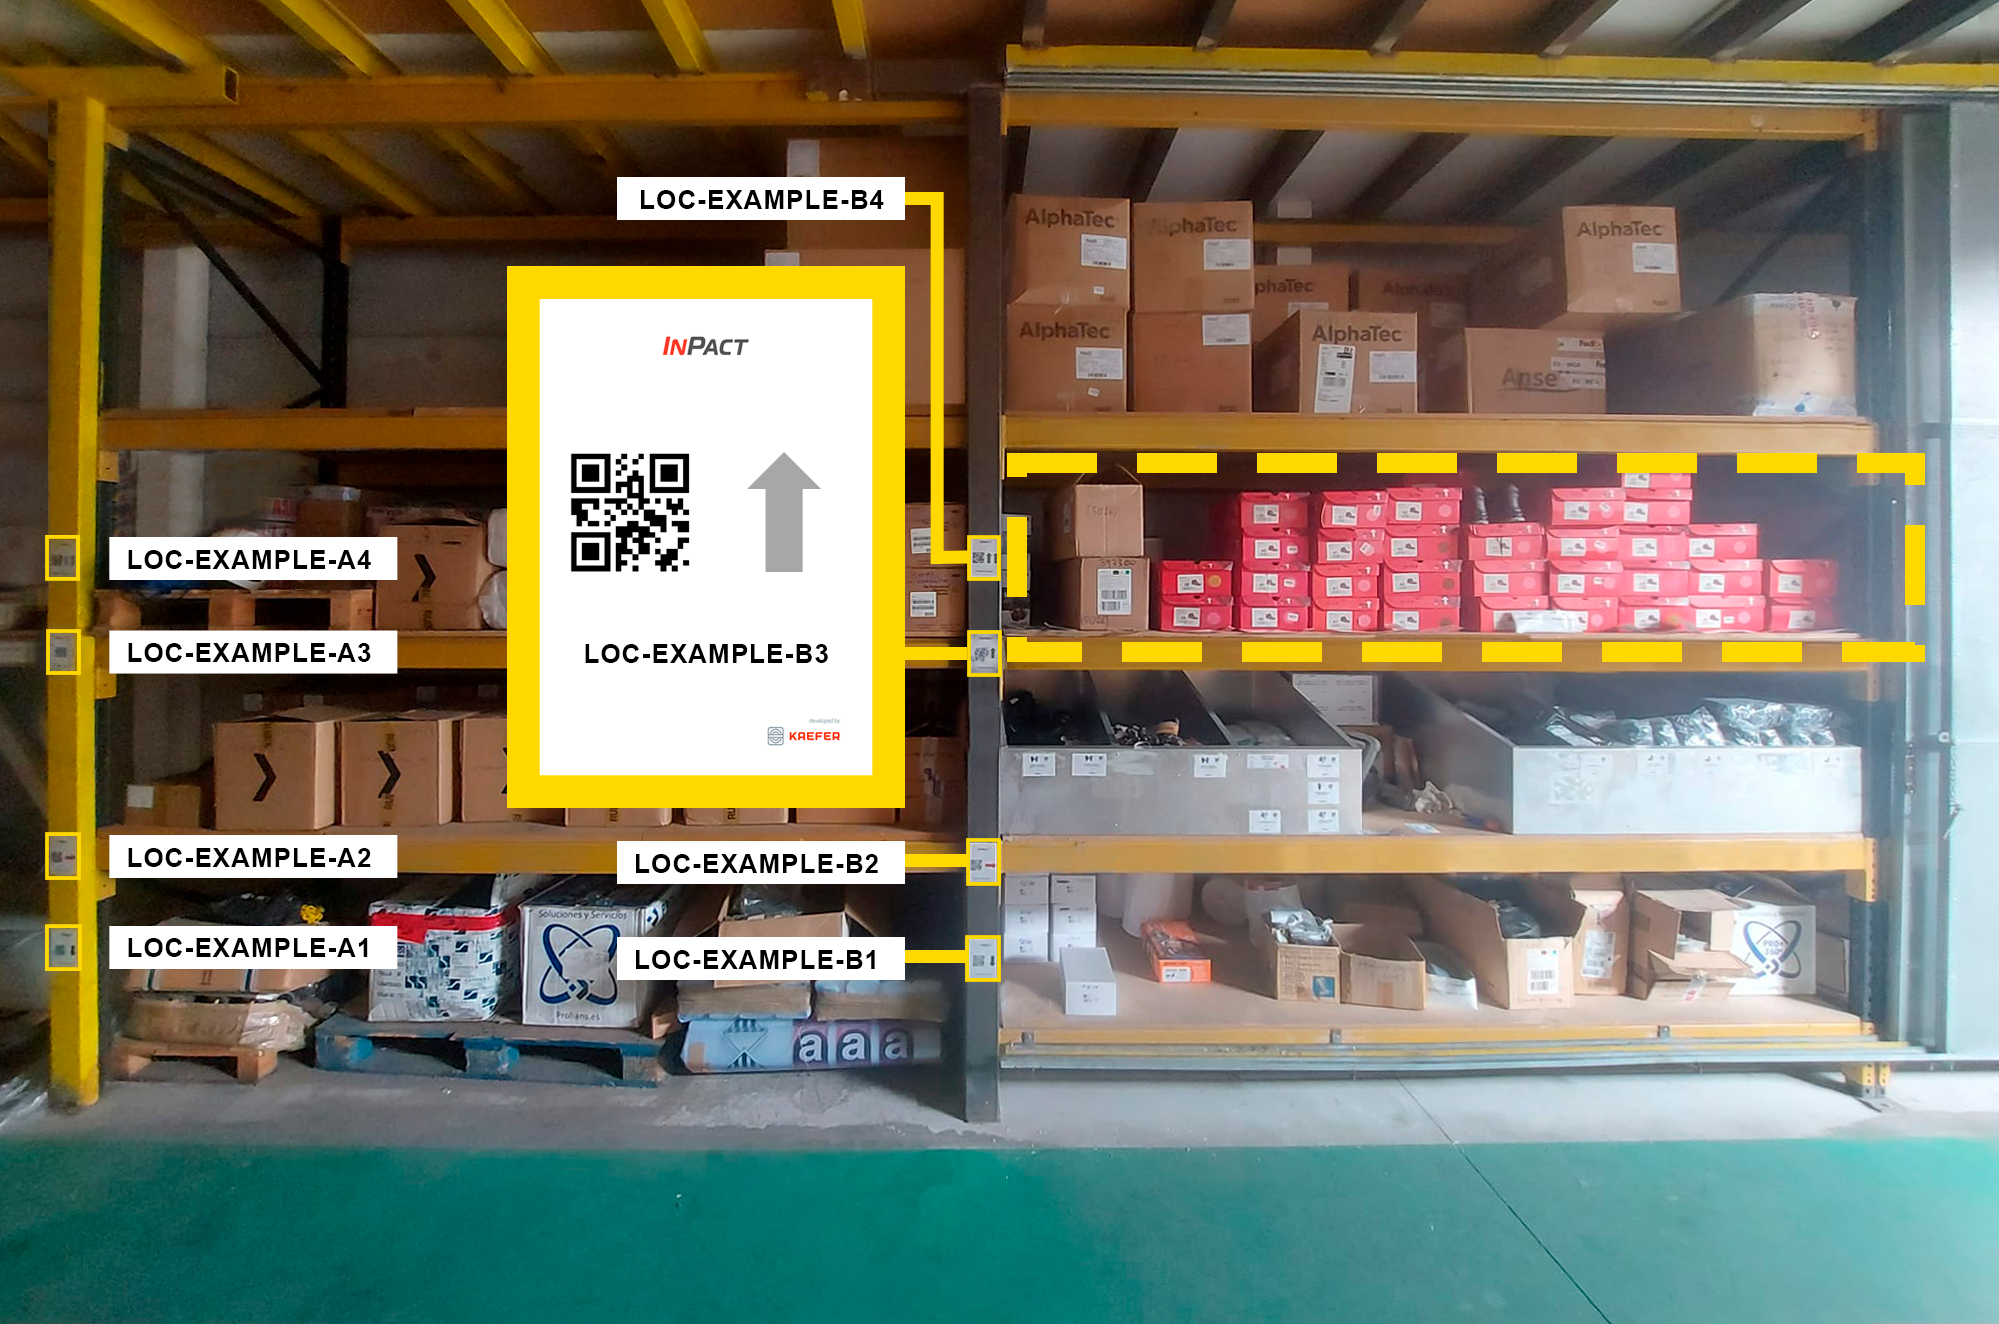
This approach employs a highly detailed system, segmenting the space into numerous specific locations, which enhances inventory management accuracy and facilitates the exact localization of each item. However, this high precision comes with an increased risk of errors due to the added complexity, such as selecting incorrect locations or misrecording movements.
This system is ideal for environments requiring precise and detailed control, such as warehouses serving multiple customers or projects, or those handling high-turnover products or items with specific traceability requirements.
2
Prepare posters.
We analyse the available space for placing the posters and the specific needs of each location, taking the following aspects into consideration:
1. Poster size:
Determined by the width of the shelves, materials, and available supports for attachment.
2. Poster support:
Depending on the type of support, various options can be used, such as:
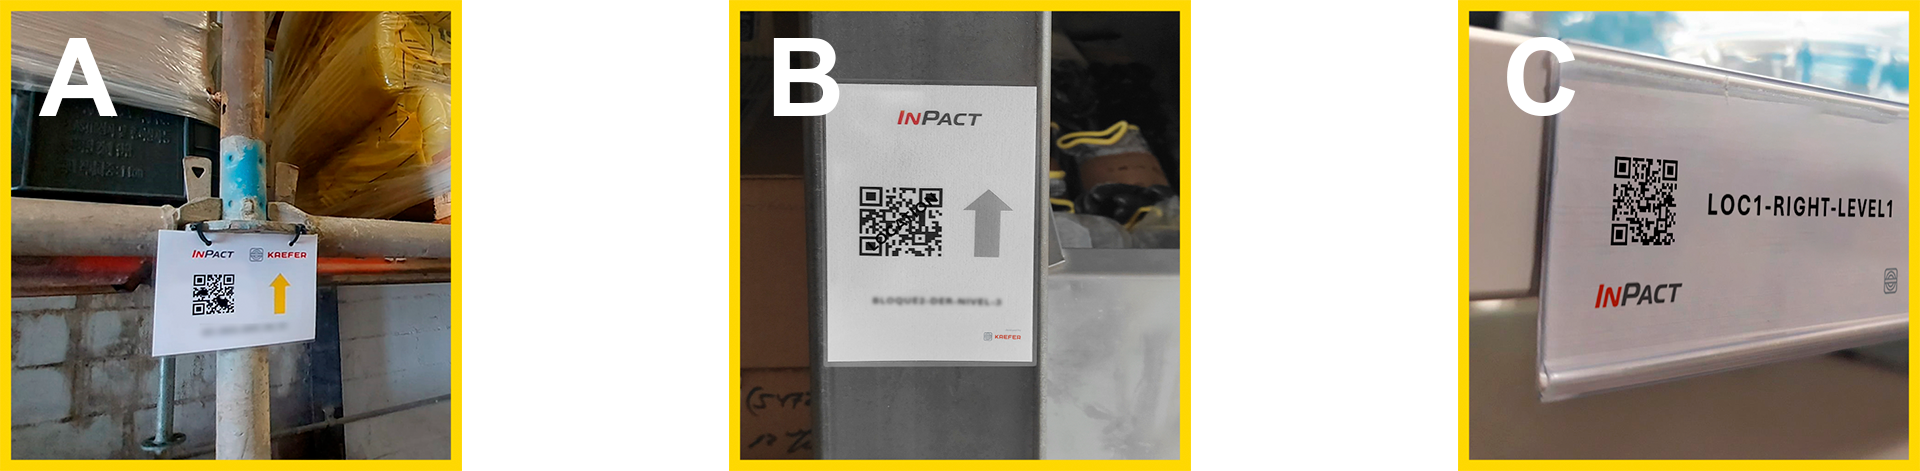
A. Laminating posters fixed with cable ties on scaffolding.
B. Laminating posters glue on the shelves.
C. Magnetic label holders on the shelves.
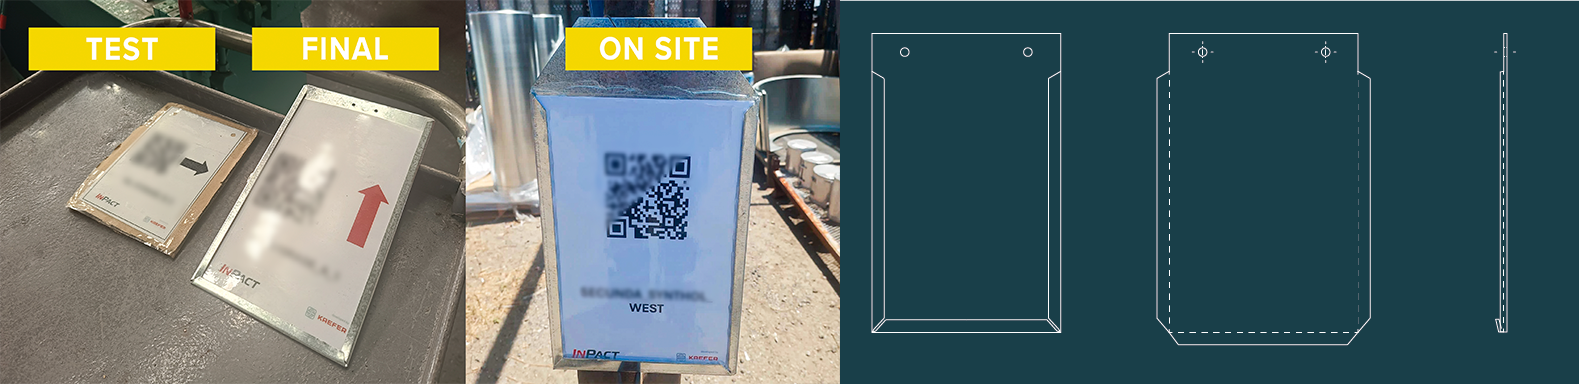
In the case of outdoor storage areas with high turnover, we recommend creating a support like the one shown in the image.
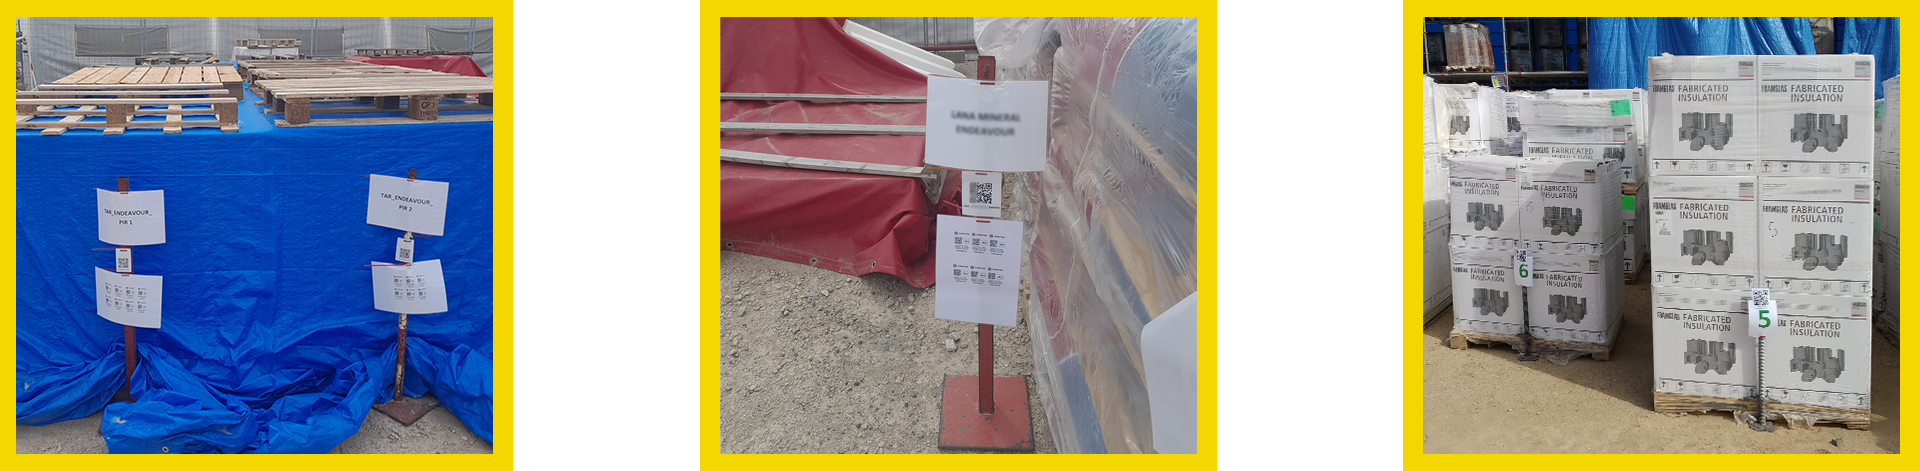
Posters placed on construction stakes
3. Paper orientation:
Choose between horizontal or vertical format, depending on the needs and design.
4. Type of printing:
Define the paper characteristics, such as cardstock, standard paper, sheet metal, etc.
More considerations:
5. Visible description:
Specify whether it will be the same as or different from the code description.
6. QR:
It is essential to ensure that the poster does not bend to avoid issues with QR code readability.
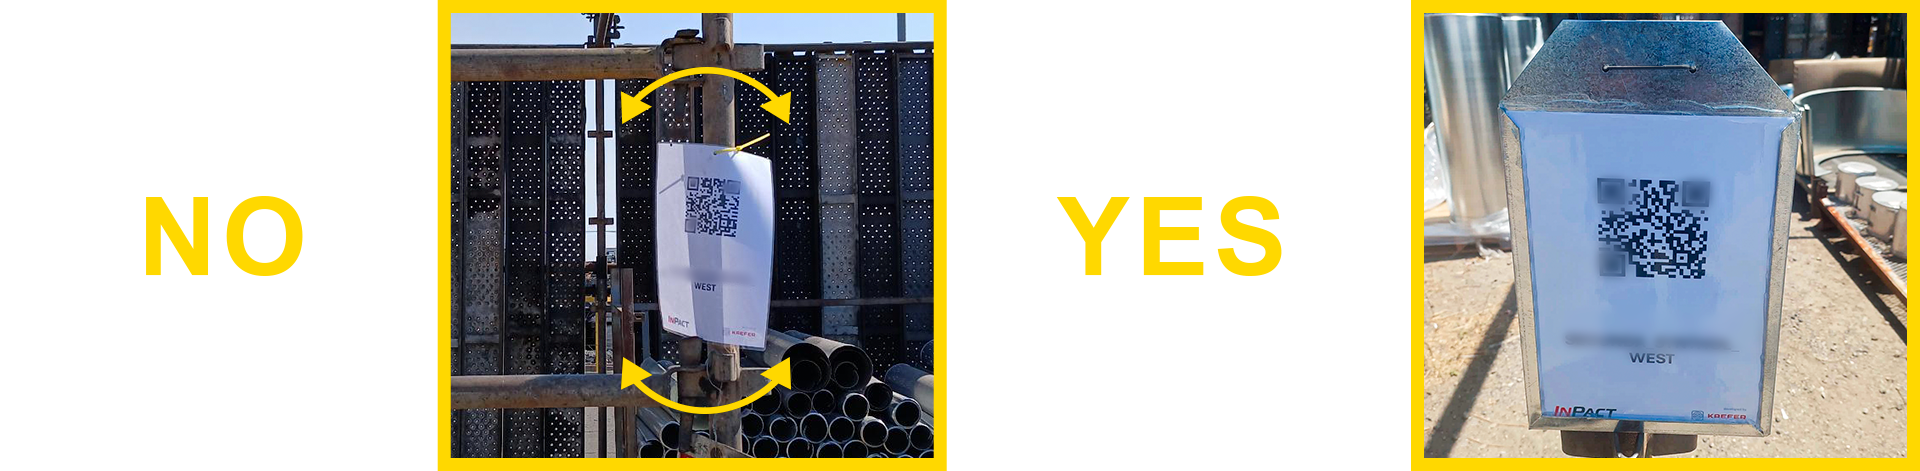
Additionally, consider the distance from which the QR code will be scanned
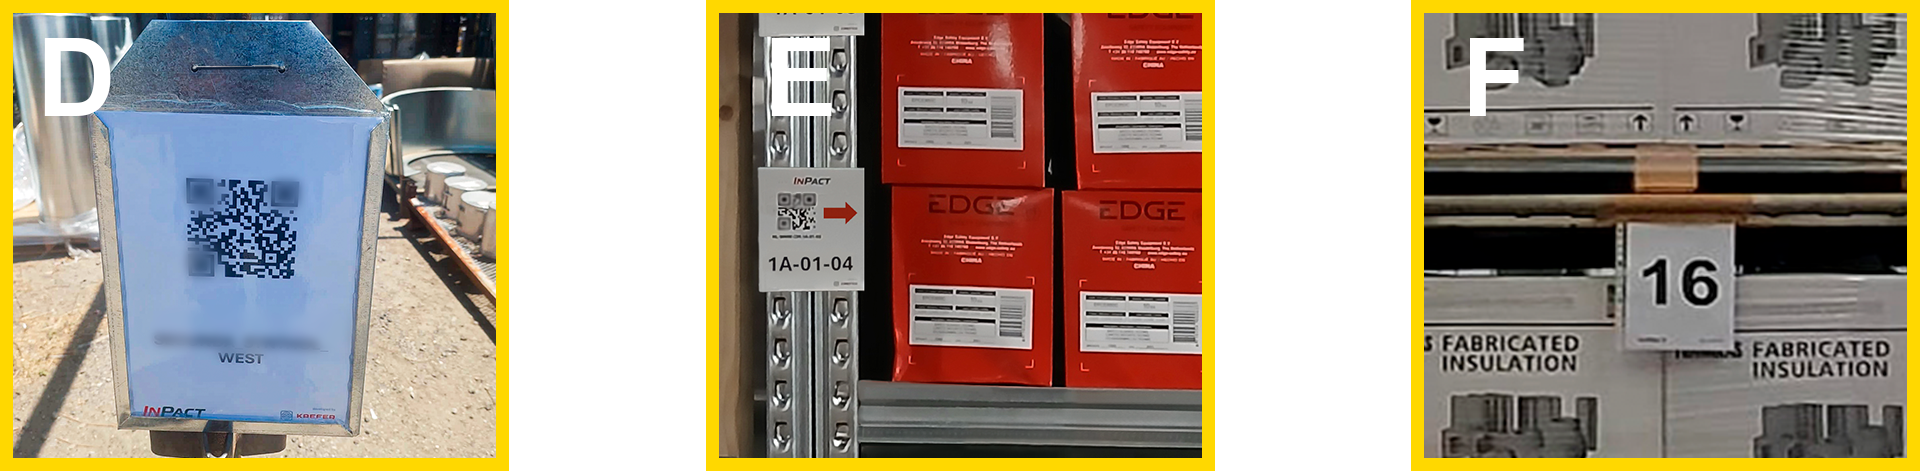
D. For locations requiring long-distance accessibility, a medium-sized QR code is recommended.
E. For shelves or smaller spaces, smaller sizes are preferable.
F. In some case, a QR code is not necessary.
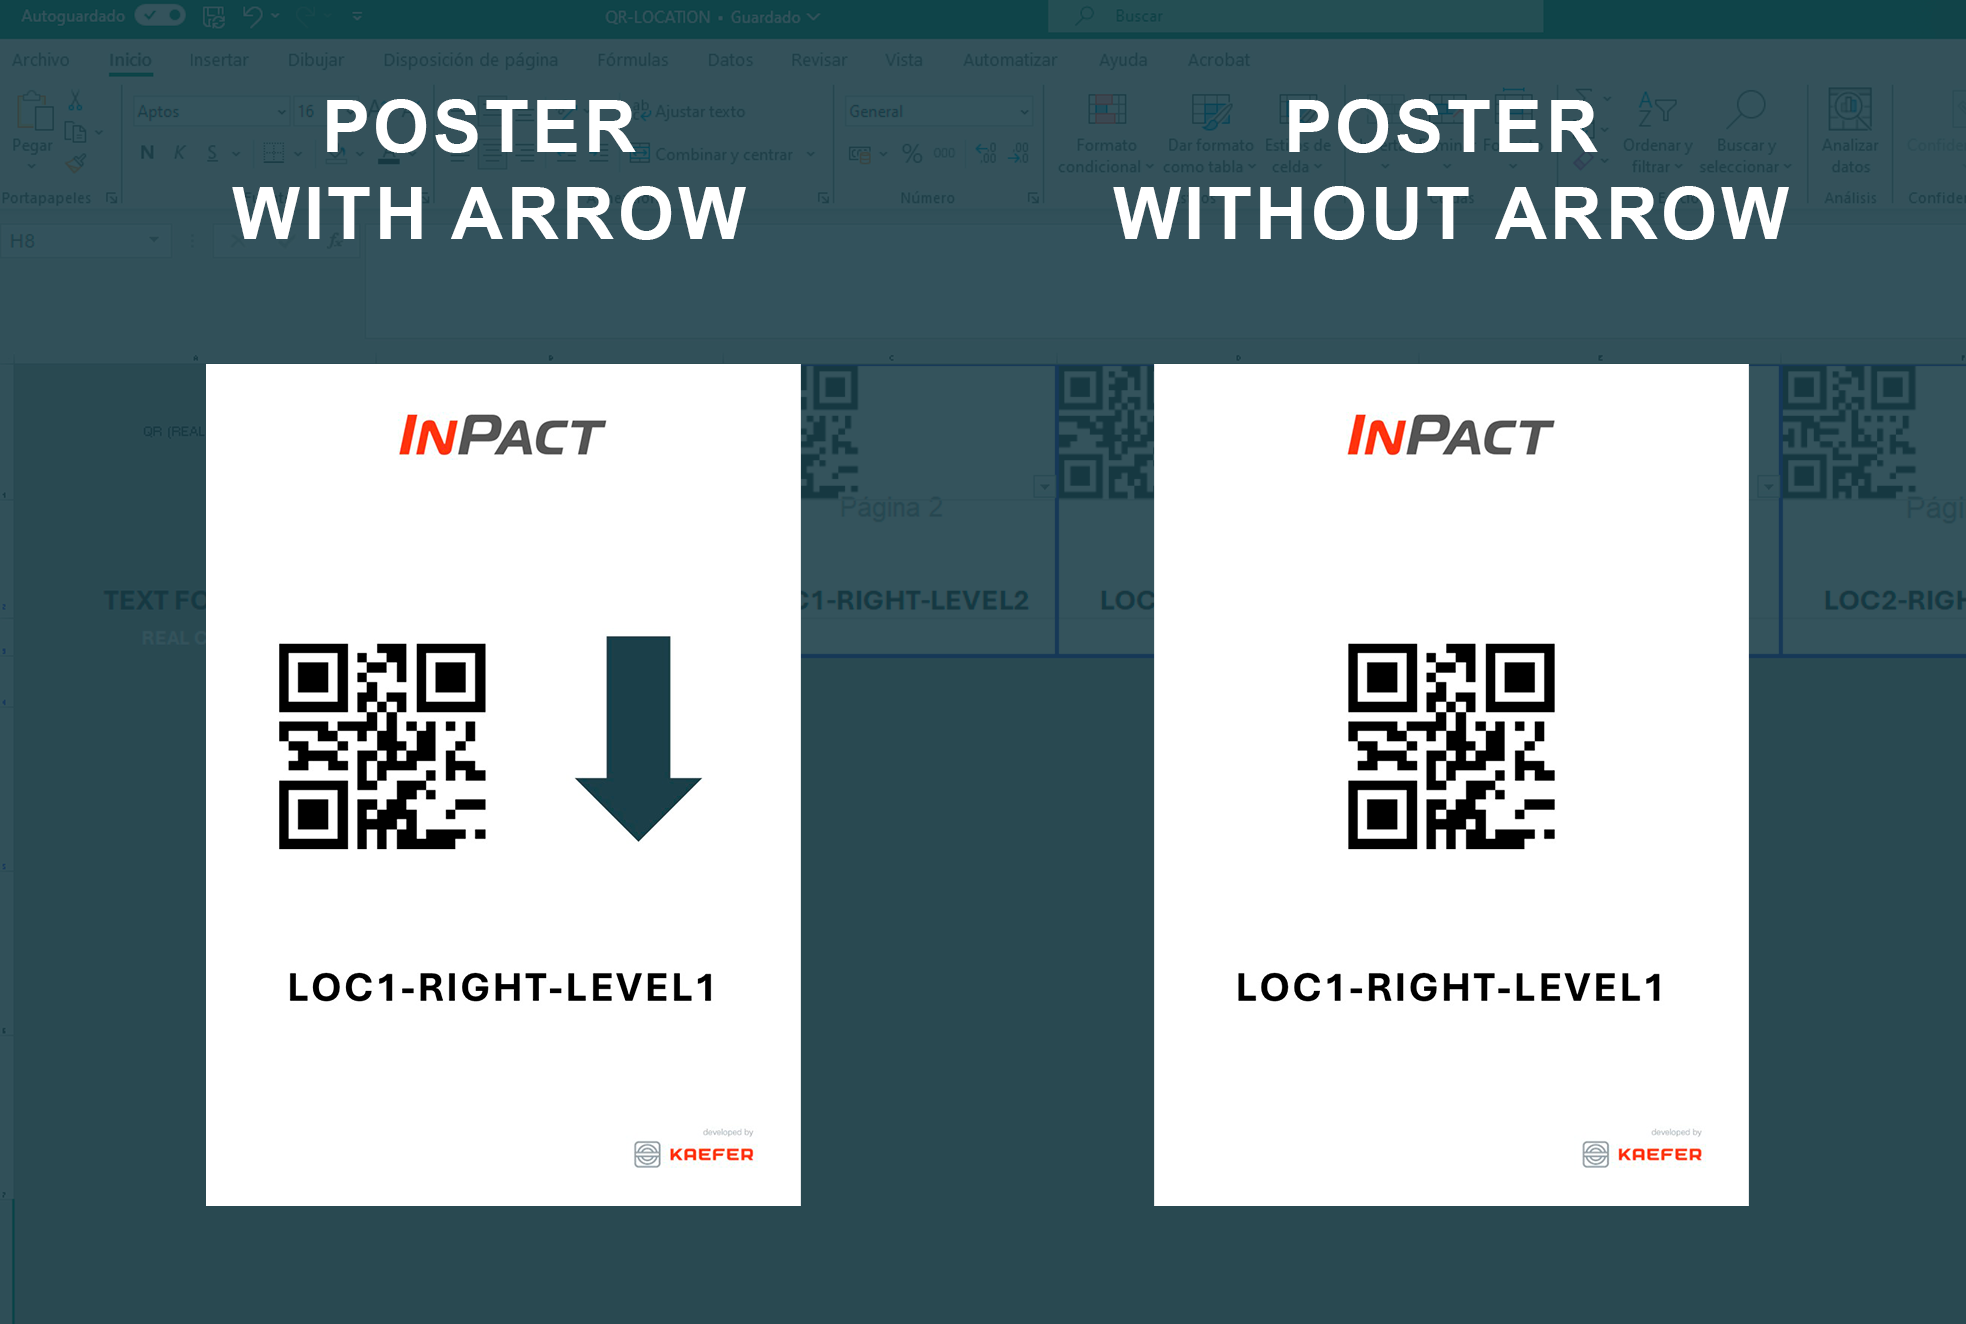
7. Arrow:
Decide whether arrows will be included, and if so, determine the direction. This is mandatory when preparing the posters.
3
Place posters.
Placing the posters is the final task to mark the area as segmented.
As we have seen, there are numerous places where identification can be placed.
Below, we will present some significant examples. To see more examples, consult Warehouse examples.
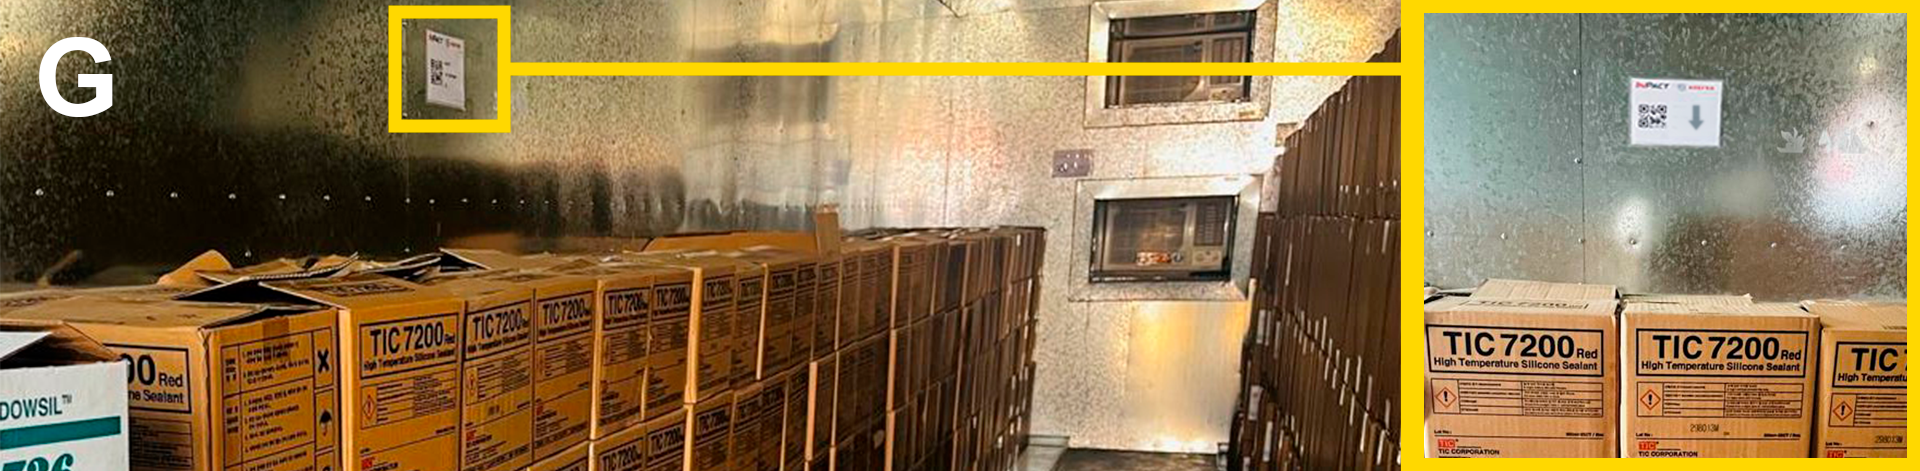
Example 1: A container in Qatar with identification mounted on the wall to indicate the location.
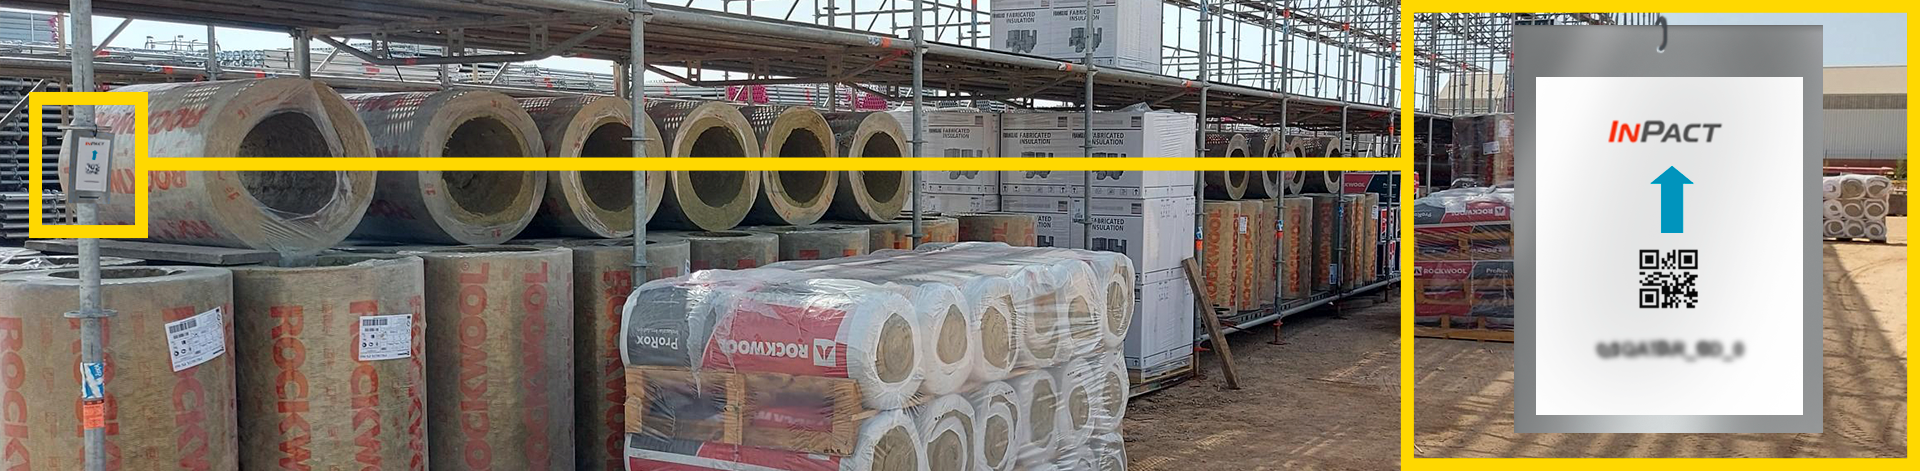
Example 2: Placement on a metal sheet on the scaffolding in a project in Spain.
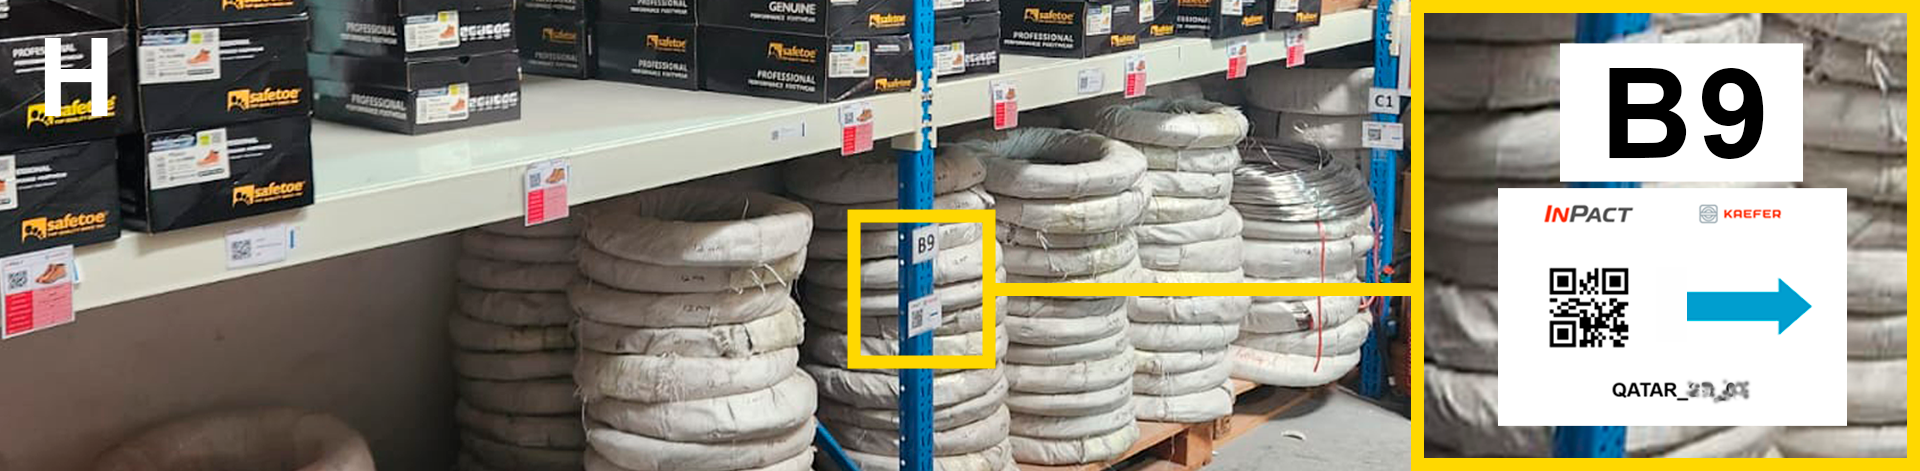
Example 3: Shelf identification in Qatar with arrows adjustable as needed.
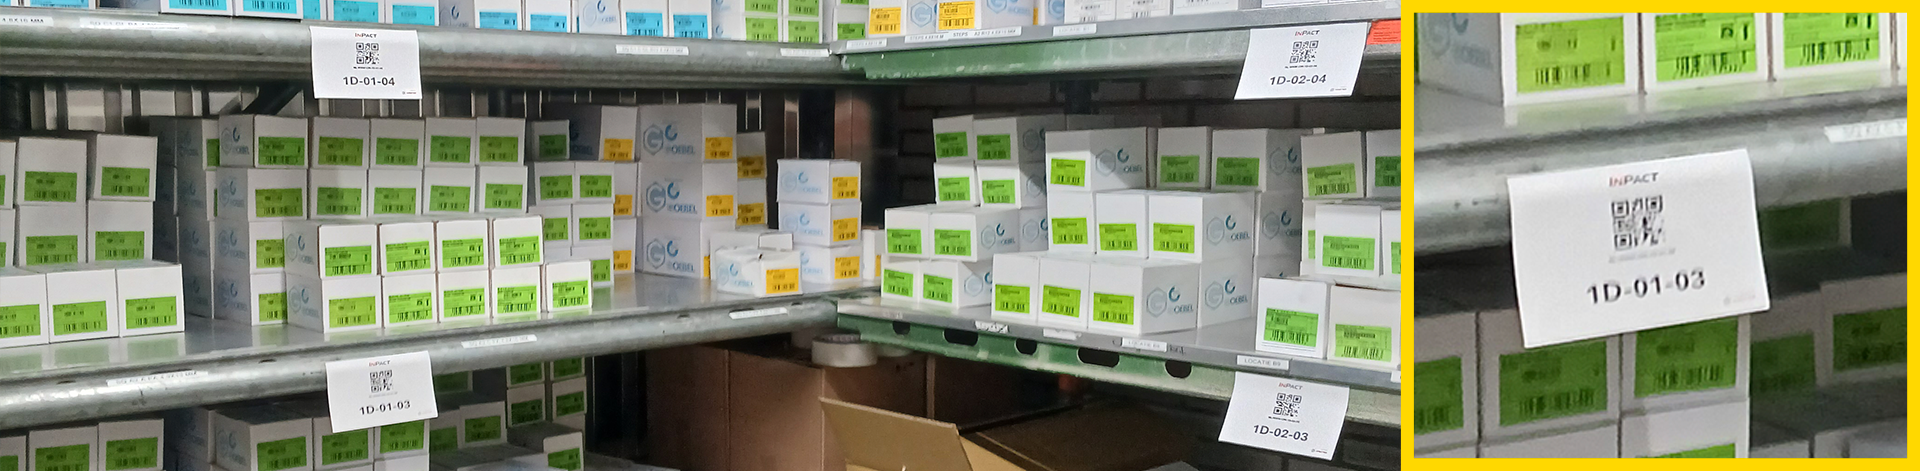
Example 4: High control in a central warehouse in the Netherlands.